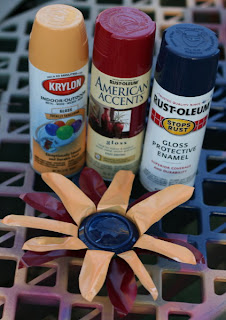
Here's a craft project I came up with, and it's so easy!
Take a soda can and rinse it with a little water. Let it dry.
Cut off the bottom of the can using a pair of scissors and leave about 1 cm around the rim. Don't worry about jagged edges but try to leave one as much as possible.
Cut the upper half into strips until you reach the lid of the can. Leave the lid intact.
Pull the strips down.
Cut the end of each strip into a soft petal point. This will clean up a lot of those rough edges.
Crimp the middle of each petal and pull the tip of the petal just a little bit down. This will make it look a little more like a petal because flower petals aren't perfect.
For the bottom part of the can, snip every 1/2 cm or so pulling the scissors down as you snip.
Push each section down towards the center of the bottom so now sharp edges are sticking
 out.
out.Spray paint the pieces. The bottom of the can will be the center of the flower, and the upper part of the can will be the petals.
Once the spray paint is dry, gently press the bottom of the can into the center of the petals. It will hold just enough, and you can pop it back out with a paperclip or a butter knife.
Make an extra layer of petals for a double blossom or extra depth and more colors.
You can use it as a container which is one of the possibilities I'm considering as favors for my wedding. I was going to make these and fill the space with a little dirt and some seeds. Guests can keep the flower as decoration or recycle it if they don't particularly care for it. Outside of that, I'm creating a giganto bottle tree, and I plan on hanging a bunch of these flowers on it for extra color, depth, and texture.


No comments:
Post a Comment
Every time you leave a comment, an angel gets his wings!